Editing of our trailer:

The first part of our editing process of our trailer was too insert a 'Restricted audience' warning. We thought this was necessary as when when analysing other trailers we noticed that they almost always had the film rating at the beginning or end of their trailer. This is something that has to feature at the beginning of every film trailer, as if you are a parent with a small child, about to watch a trailer, it informs you right away that you should not encourage your children to watch the film/trailer to this film as it involves content that it not suitable for everyone.


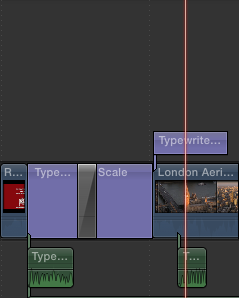
In our film trailer, we knew it was vital that we used an establishing shot of London, as in most action films they use a birds eye view of the location they are filming in. We needed an establishing shot of London, but obviously this was not practical and impossible for us to do. Therefore we used a found shot of London. We then cut out the parts of this shot using the blade tool on Final Cut Pro, so only the more profound landmarks of London were seen. We did this as it meant we would target a larger audience due to the amount of tourist's these landmarks attract. The next thing we did was added in subtitles at the bottom left hand corner of the shot, adding the date and location of the shot, this makes the audience aware of the time period and where the film is set. We thought that adding these subtitles fitted in quite well with the genre as it is quite a common feature in action films, as often action films are filmed and set in various different locations worldwide. Obviously we didn't have the ability to be able to film in loads of different countries, but the subtitles set the idea of filming in loads of locations. Once we had cut our shots we added a type writer sound for a professional effect.

We wanted our characters to be introduced in our trailer, we started of with a long shot of Megan walking towards the camera. We think this shot is effective as in the background it looks really busy on the roads, yet the character is on her own walking, meaning that she looks really isolated and endangered on her own.
As she gets closer to the camera, she then turns her head as if something dangerous is behind her, we slowed down this shot to build the tension and create a sense of danger as the audience won't know whats behind her. At this point her character is introduced, we used slow motion, then pull focus to blur out the shot, her name then appears so the focus of the shot moves so its on her name.
We got the inspiration of showing her name like this, partly from the film Legend, we really liked the way the characters got introduced in this trailer, so we experimented on final cut, until we found a way which suited our film. The font we used was quite toned down, and not in your face, which we quite like as it fits our theme.
One shot that we were really pleased with in our trailer was this low shot which focused on our characters feet running. In the middle of this shot our character drops her gun, this creates a suspicious effect and makes the audience want to know what is going on behind her and ask multiple questions such as; why is she dropping her gun? Who is behind her? What is about to happen next? We slowed down this shot so that the dropping of the gun is seen more vividly and moves across the screen in slow motion so that is something that the audience have to notice. The black gun is an iconic feature of our trailer so the audience have to see it.


